|
You must have Raptor's most excellent NWX Editor. You can get it from TheOutlawDad's site (Nwxed03.ZIP) Read his TXT files, especially if you will be making custom characters. You will be modifying BMP files, so MS Paint will work, but I use Paint Shop Pro 5. They have moved on to v6, however. You can get it on a 30 day free trial. I got it mainly for custom PCX work, but I just like it. |
||||||||||||||
|
The first order of business is to choose what kind of object you are interested in making. Unfortunately, many of the characteristics of an item are buried in the code. You can use NWX Editor to change the look, and you can remove unwanted cells and frames. Modifications to the ITM file change the amount of physical room the object will take up in the game and the height at which it will be located in the sector. If it is something that will break, the sound of the breaking (if any) will remain the same. If it generates other objects upon breaking, that attribute will remain. Residue from the breaking will remain a player obstacle. Most 360 degree view objects use 8 or so cells, but these only represent 180 degrees. The other views are generated from their opposite counterpart by the NWX. Changing sound of breaking, etc: You can't actually change it in the NWX, but you can fool Outlaws into using a different sound. Suppose you used one of the bottles as your base, the sound used is bottle.wav. Simply copy the WAV that you want to use into your Project Directory, and rename it bottle.wav. Your new breakable object will break with the sound you want. There are several objects already in Outlaws that don't appear in your resource picker simply because there is no ITM file associated with them. I've yanked a few out and made ITM files in order to use them in maps. The baskets and the lamp in Pearl River Plantation are in this category. I only recently found reeds01a. It's in the chart below. That is a tremendous number of cells for animation and should allow for some pretty complex objects. Want to try your hand at a rearing horse? Here's your NWX base. |
||||||||||||||
|
If you are lookin for help in making custom weapons with custom effects, you've come to the wrong place. Personally, I don't like mod effect weapons. The only changes I have made to weapons is their look and amount of ammo included. In Ghost Hill, I made my own take on vertical weapons. The only oddness in this is that anything that regenerates requires a separate ITM file for this to happen. Look at any of the numerous examples to see how this is done. It's really just renaming files and adjusting the file calls in the ITM. I did work on a custom weapon. Check below for pitfall. It applies to the NWX associated with holding the weapon in your hands in the game. |
||||||||||||||
|
Partial listing of Items and their attributes ( * = changeable ) |
||||||||||||||
|
Name |
Breaks |
Ceiling* |
Animat Frames |
Obstacle* |
Gens Objects |
Sound |
ITM* |
360 Multiple |
||||||
|
Rplant01 |
|
|
12 |
|
|
|
Y |
|
||||||
|
Lantern |
Y |
Y |
|
Y |
Y |
Y |
Y |
|
||||||
|
Cowskull |
Y |
|
|
Y |
|
|
Y |
|
||||||
|
Bottle01 |
Y |
|
|
|
|
Y |
Y |
|
||||||
|
Boblamp |
|
|
|
Y |
|
|
|
|
||||||
|
Reeds01 |
|
|
|
|
|
|
Y |
|
||||||
|
Horse01 |
|
|
|
Y |
|
|
Y |
Y |
||||||
|
Reeds01a |
|
|
36 |
|
|
|
|
|
||||||
|
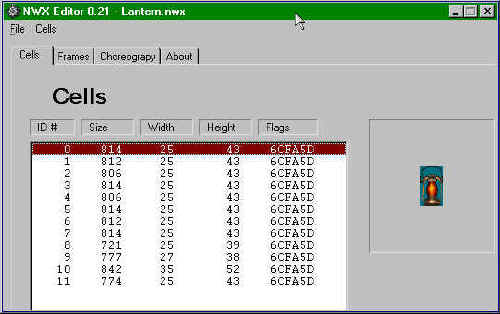
I chose to demonstrate with one that I had already worked up for Pearl River. It points up a couple of fairly unique problems. What I was looking for at the time was a different light source for the slave cabins. I wanted something that looked more at home on a table and didn't look quite so western. In its original concept, I just wanted it to sit there and made a lamp accordingly. When ShotgunMc saw this, he offered to use Lantern.nwx to make it explode. Following is the process we went through to come up with the final lampsmc.nwx. BTW, pay no attention to the filename at the top of the first Editor screen. The first step is to use ConMan to extract the base NWX and ITM, then rename them. Changes must be made to the ITM txt also. More on that later. |
||||||||||||||
|
I originally used cactus01 as a base. Naturally, Shotgun used Lantern. Note that it has 12 cells with the numbering beginning with 0. |
|
|||||||||||||
|
|
In this instance, I don't really need to do this, but in the next frame I will use the extracted BMPs to show the progression of the animation and breaking. Extracting one cell is a good idea to get a feel for the size. Assuming you have seen the base in the game, you'll have some appreciation for how much it needs to be changed. |
|||||||||||||
|
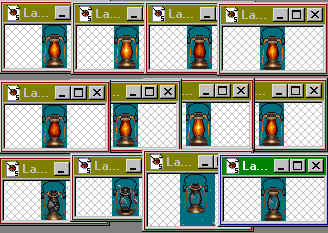
Extracting the Cells creates BMPs that can be modified. Of course, you can just make BMPs from scratch to use as replacements. Here are all the BMPs for the cells, in order. As you can see the first 8 just animate the flicker. The next 3 are the shot animation. The last is how it will look after being shot. |
|
|||||||||||||
|
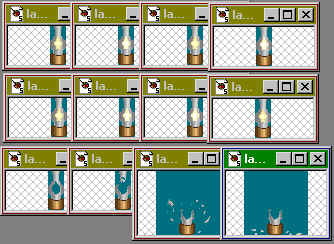
Here are the replacement BMPs. I should mention that I chose a round figure to cut down on that effect whereby objects turn to follow you around the room when you move by them. This whole process actually led to another custom object in Pearl. There is another lamp that doesn't explode. It just breaks. |
|
|||||||||||||
|
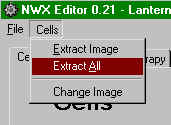
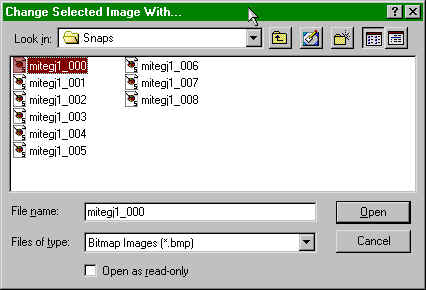
You probably noticed the option Change Image under the Cells pull down menu. I'm willing to bet that you can follow your nose through the actual process, but what the heck. Here's a nice shortcut. (Bless you Rap, hehe.) |
||||||||||||||
|
Actually just double clicking as shown gets you to the needed window. |
|
|||||||||||||
|
Well, these files are left over from when I made the mites and tites for Ghost Hill. Note the numbering that I did while making the replacement BMPs. It helps to keep them straight, even if you are doing the BMPs from scratch and not bothering with the extracted BMPs from the NWX. |
|
|||||||||||||
|
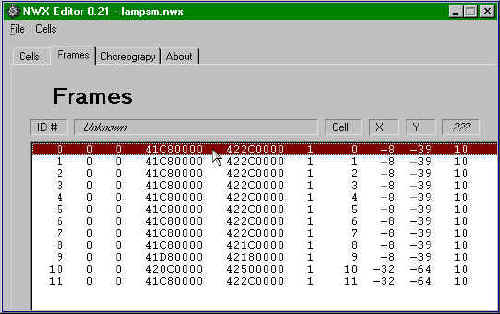
After the cells are all done, we need to worry about frames. The same trick of double clicking brings up the needed window. |
|
|||||||||||||
|
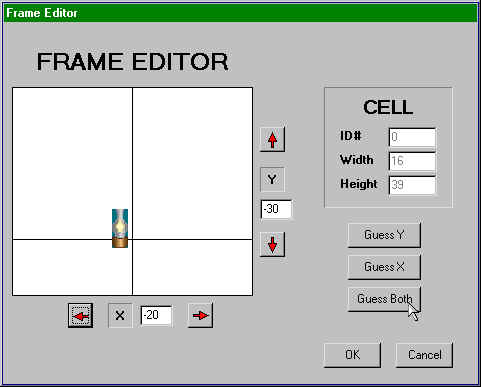
The Frame Editor adjusts how the cell will behave in the game. Depending on the changes rendered by your new BMPs, some odd stuff goes on here. If ya want the object to sit on the floor of a sector, just clicking Guess Both works just dandy. Do this for each frame. Then all you have to do is exit the Editor. It autosaves. |
The NWX part of your new object is done. |
|||||||||||||
|
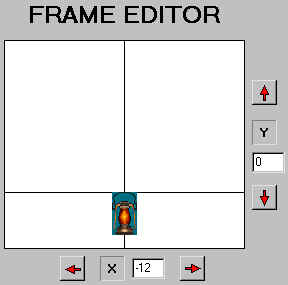
Before I get on to ITM modifications, here's a little oddity. This is the way the original Lantern.NWX lays in the frame. This is how ya get something to naturally hang from the ceiling. If you've ever auto layered a lantern via duplicate, you may have wondered why it ended up on the ceiling. Here's why. After dragging it to the floor, it may have driven you nuts as to why it would only break if you shot over it, near the ceiling. That's another problem, which is solved in the ITM. |
|
|||||||||||||
|
|
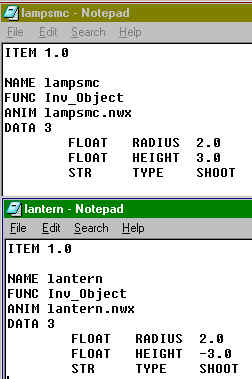
Here are both ITM files for the base and the new objects. As noted earlier, the basic routine is just changing the file name and the file calls in the text of the ITM file. There are a couple of other things you can do here though. Changing the RADIUS and HEIGHT values to 0.0 takes away the obstacle characteristic of your object. You can make them fatter and taller, too, if ya like. See that minus sign in front of 3.0 in the HEIGHT line of lantern.itm? That's what makes it shootable only near the ceiling. Since my object needed to be shot as it sat on a table, I changed it as noted. |
|||||||||||||
Here's that weapon info I mentioned at the top.
If you've checked out Broken Treaty by Truffle, you will see a very unusual NWX for a weapon as it appears in your hands. If anyone ever makes a weapon that goes from bottom to top in the OL screen, beware. DirectDraw and Glide render the position differently, so the BMP must be made taller than 480 pixels to allow for this shift. Otherwise you end up with a blank at the bottom or the top in one or the other modes. I did some overkill to allow Truff to frame it how he wanted. This applies to any such NWX, though. As always, make sure to check your map in both DD and Glide to avoid a blank at the bottom, at least, and if making a weapon like the Bow that goes all the way to the top, maybe a blank up there.
Well, that's about it. The objects I know how to make are pretty much just eye candy for my maps. If you are more ambitious, more power to ya. For example, badguys behave a bit differently. I've never done an SP map, so that is foreign territory to me. I just hope that this has gotten ya off in the right direction.